> For the complete documentation index, see [llms.txt](https://help.citrusad.com/retail-media-interface/llms.txt). Markdown versions of documentation pages are available by appending `.md` to page URLs; this page is available as [Markdown](https://help.citrusad.com/retail-media-interface/retailer-team-and-user-management/managing-teams.md).
# Managing teams
As a retailer, you can manage all the supplier teams and users within your retail media network. The Teams Manager lets you view teams, create new teams, invite users, and control user permissions.
{% hint style="info" %}
This feature is available to retailer users. If you don't see the Teams menu, contact our Support team to confirm your user access.
{% endhint %}
***
### How to access Teams Manager
1. Log in to your Epsilon Retail Media account
2. Select your Retailer team from the team selector
3. Click **Teams** in the left navigation menu
4. Click the **Manage Teams** tab
***
### Viewing your teams
The Teams Manager displays all teams you have access to, including:
* **Supplier teams** (advertisers/brands)
* **Retailer teams** (your internal retailer teams)
#### Teams table
| Column | Description |
| ------------------------- | -------------------------------------------------------------------------------------------------------------------------------------------- |
| **Team Name** | The display name of the team |
| **Team ID** | Unique identifier for the team |
| **Company Name** | The company or brand name |
| **Marketplace Seller ID** | The applied marketplace seller ID from the retailer's catalog. Only shown when a catalog in the platform has seller IDs assigned to products |
| **Users** | Number of users in the team |
#### Searching for teams
Use the search bar to filter teams by name. Results update as you type.
#### Exporting teams
Click **Export** to download a CSV file of all teams. The file includes Team ID, Team Name, Company Name, and User Count.
***
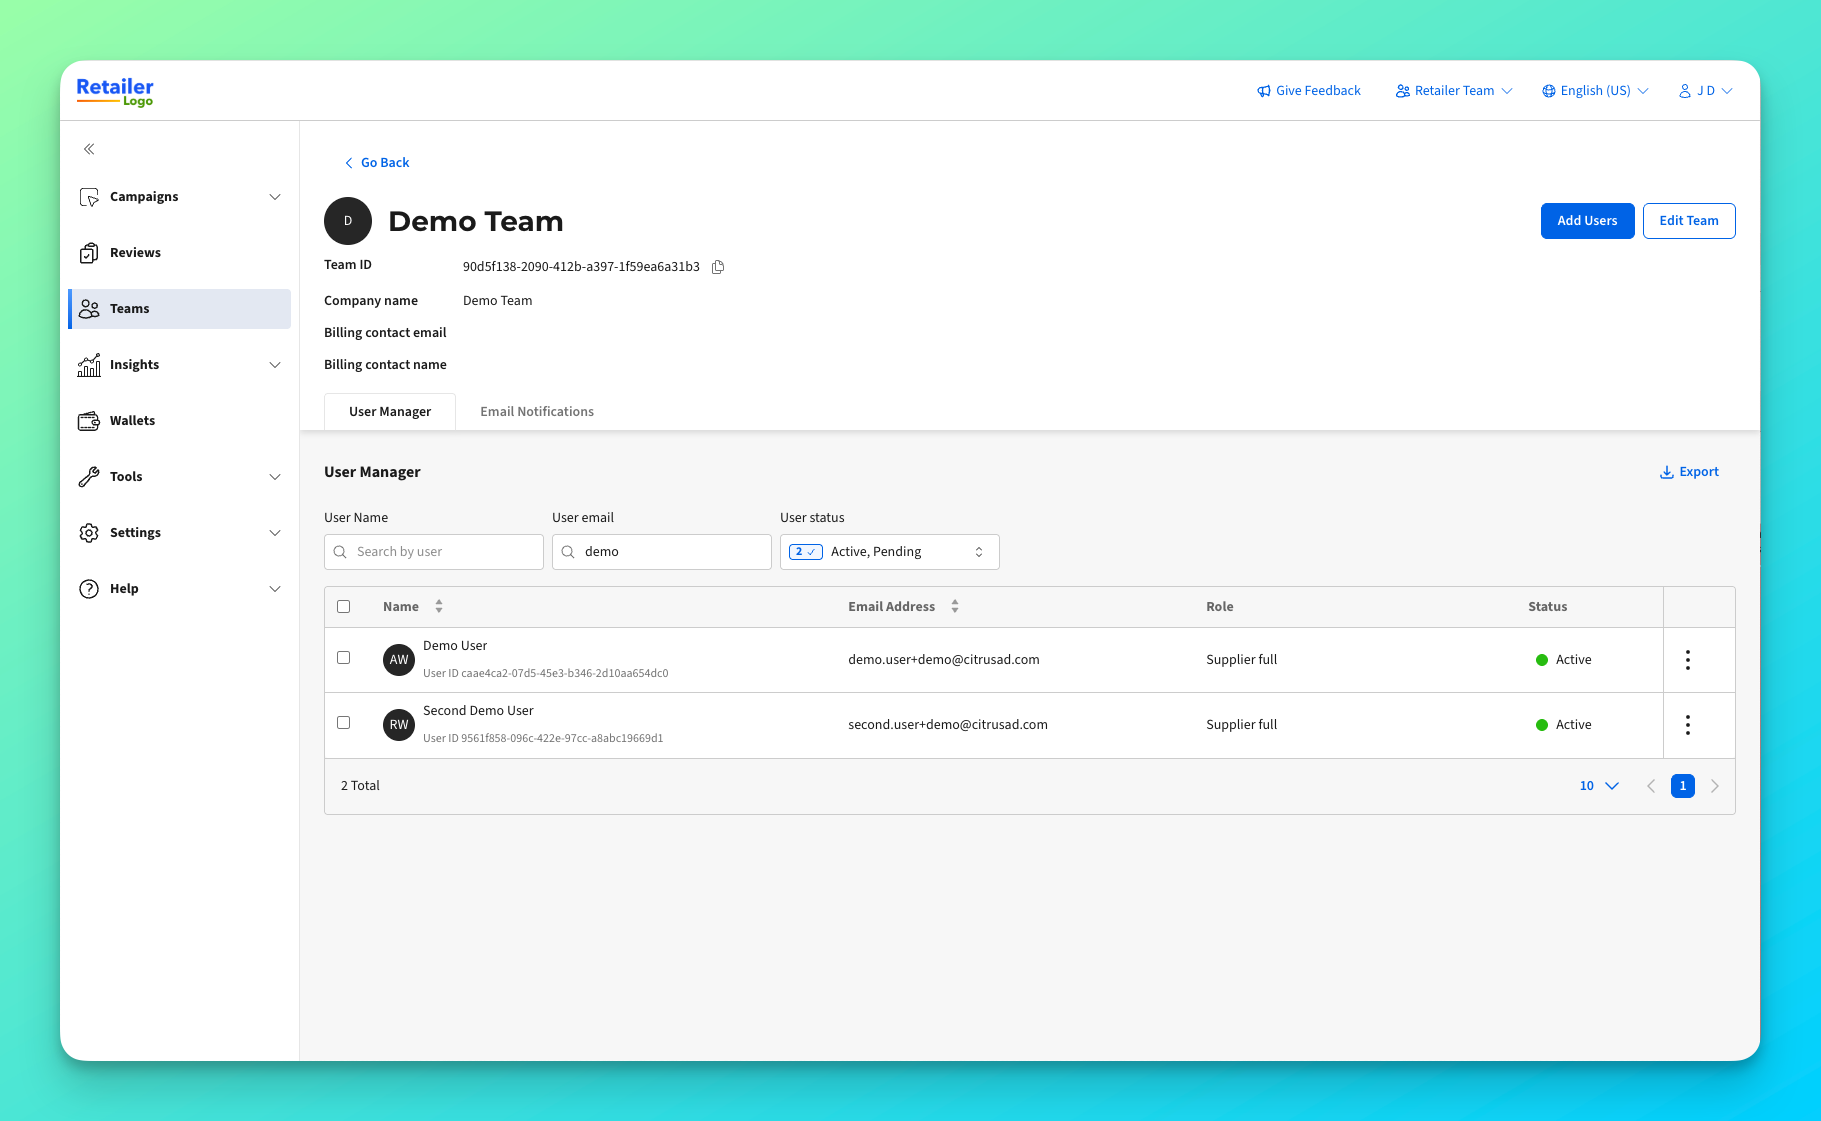
### Viewing team details
Click on any team in the table to view its details, including:
* Team information (ID, company name, billing details)
* List of users and their roles
* Pending invitations
***
### Managing users
#### Viewing users
The Users table shows all team members with their:
| Column | Description |
| ---------- | --------------------------------------------------------- |
| **Name** | User's display name |
| **Email** | User's email address |
| **Role** | Permission level (Full Access or Report View Only) |
| **Status** | Active (accepted invite) or Pending (awaiting acceptance) |
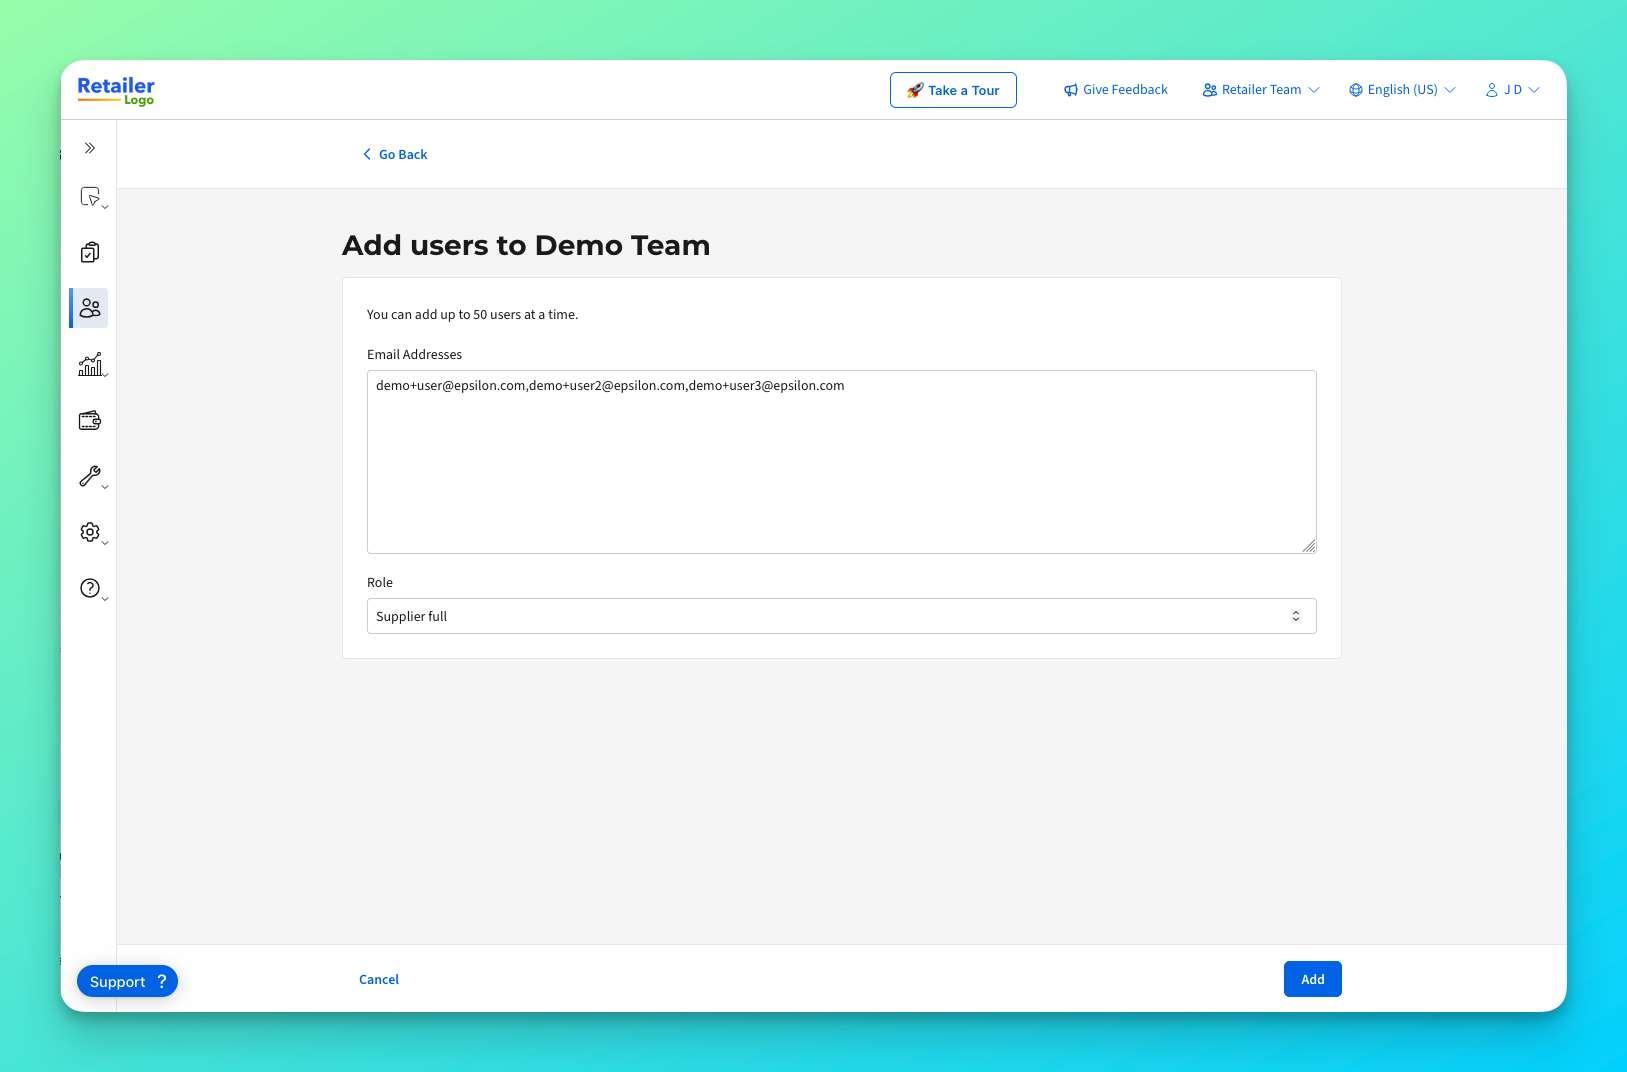
#### Inviting new users
1. Click the **Add User** button
2. Enter the user's email address
3. Select a role:
* **Full Access** — Can create and edit campaigns, manage settings
* **Report View Only** — Can only view reports and analytics
4. Click **Add**
The user will receive an email invitation. New users will be prompted to create an account, while existing users will see the team automatically added to their account.
{% hint style="info" %}
Supplier users who already have an Epsilon Retail Media account will be added to the team automatically. New users must accept their invitation before they can access the team — you can copy the invitation link for pending users if they didn't receive the email.
{% endhint %}
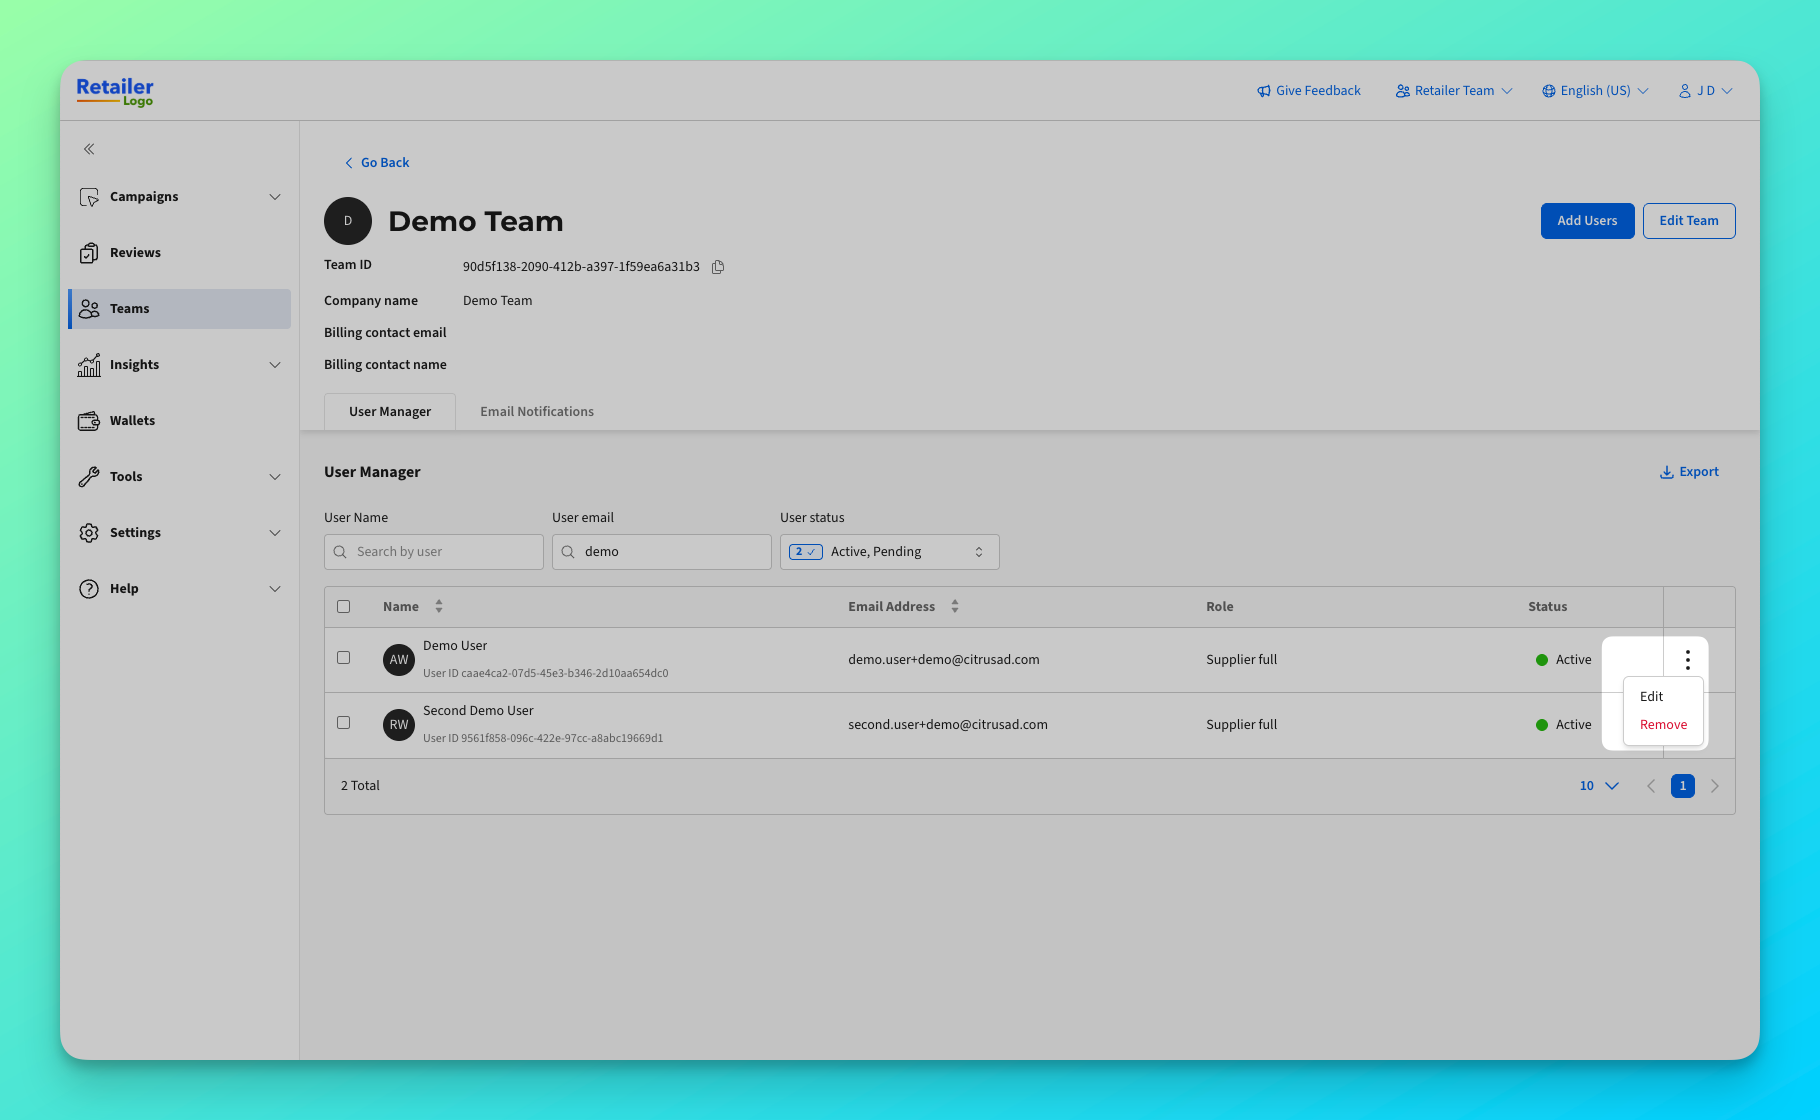
#### Editing user permissions
1. Find the user in the Users table
2. Click the **Actions** menu (three dots)
3. Select **Edit**
4. Choose a new role
5. Click **Update**
#### Removing users
1. Find the user in the Users table
2. Click the **Actions** menu (three dots)
3. Select **Remove**
4. Confirm the removal
{% hint style="warning" %}
Removing a user revokes their access to the team immediately. They will no longer be able to view or manage campaigns for this team.
{% endhint %}
#### Resending invitations
For pending users who haven't received their invitation:
1. Find the pending user in the Users table
2. Click the **Actions** menu (three dots)
3. Select **Copy Invitation Link**
4. Send the link to the user directly
***
### Editing team details
1. Navigate to the team's detail page
2. Click **Edit Team**
3. Update the fields you want to change:
* Team Name
* Company Name
* Profile Image (upload a logo)
* Billing Contact Name (supplier teams only)
* Billing Email (supplier teams only)
* Additional information fields
4. Click **Update**
***
### Adding a seller ID to a team
Seller IDs link a supplier team to the product catalog, enabling campaign targeting and reporting based on seller-specific data.
1. Navigate to the team's detail page
2. Click **Edit Team**
3. Scroll to the **Seller ID** field
4. Enter the seller ID as per your product catalog system
5. Click **Update**
{% hint style="info" %}
A team can have one seller ID. If a supplier sells under multiple seller IDs, create separate teams for each.
{% endhint %}
{% hint style="warning" %}
Ensure the seller ID matches exactly with your product catalog. An incorrect seller ID may result in missing product data or targeting issues.
{% endhint %}
{% hint style="warning" %}
Once a seller ID is assigned, it can only be removed by contacting support. Removing/changing a seller ID does not change any historical performance or campaign configurations. Issues with campaign attribution and historical reporting are possible.
{% endhint %}
***
### Exporting users
To download a list of all users in a team:
1. Navigate to the team's detail page
2. Click **Export**
3. A CSV file downloads with User ID, Name, Email, Role, and Status
***
### Tips for success
* **Use descriptive team names** — Include the brand or company name for easy identification
* **Assign appropriate roles** — Give Report View Only access to users who only need to view analytics
* **Keep user lists updated** — Remove users who no longer need access to maintain security
* **Check pending invitations** — Follow up with users who haven't accepted their invitations
***
### Troubleshooting & support
| Issue | Resolution |
| ------------------------------------ | --------------------------------------------------------------------------------------------------------- |
| Can't see the Teams menu | Contact our Support team to confirm your user access |
| User didn't receive invitation email | Use "Copy Invitation Link" to send the invitation manually |
| Can't create a new team | Verify you have edit permissions. Some retailers restrict team creation to specific users |
| Can't see all teams | You can only see teams you have access to. Contact your administrator for additional access |
| Search not finding a team | Try searching by different parts of the team name. Search matches team names only |
| Seller ID not working | Verify the seller ID matches your product catalog exactly. Check for extra spaces or incorrect characters |
For additional help, contact your Epsilon Retail Media representative or use the Support tab within the platform.
---
# Agent Instructions
This documentation is published with GitBook. GitBook is the documentation platform designed so that both humans and AI agents can read, navigate, and reason over technical content effectively. Learn more at gitbook.com.
## Querying This Documentation
If you need additional information that is not directly available in this page, you can query the documentation dynamically by asking a question.
Perform an HTTP GET request on the current page URL with the `ask` query parameter, and the optional `goal` query parameter:
```
GET https://help.citrusad.com/retail-media-interface/retailer-team-and-user-management/managing-teams.md?ask=&goal=
```
`ask` is the immediate question: it should be specific, self-contained, and written in natural language.
`goal` is optional and describes the broader end goal you are ultimately trying to accomplish on behalf of the user. GitBook uses it to tailor the answer towards what is most useful for that goal.
The response will contain a direct answer to the question and relevant excerpts and sources from the documentation.
Use this mechanism when the answer is not explicitly present in the current page, you need clarification or additional context, or you want to retrieve related documentation sections.